Displacement shaders are are assigned on a per-object basis. In ShadeTree you must have the Shader Type set to displace in the Render Options Editor.
When the renderer is rendering an object, the object's surface is divided into triangles. This is called tesselation. Each of the three vertices becomes a point on the surface. Since a triangle defines a single plane, this gives the renderer the normal for that area of the surface. If you increase the parametric approximation, more triangles, and thus more vertices, are generated for each patch in the surface and the closer the rendered surface fits the geometrically defined surface. The displacement shader tells the renderer the new position for each of those vertices.
The only thing required in a displacement shader is the 'Result' box. This single box can actually be a 'displacement shader' all by itself. By casting the 'Result' box as an miScalar, the value selected will return the amount to incease (or decrease) the size of the entire object.

In most instances, you'll want to use one of the pre-defined 'displacement shader' boxes. To use a pattern or a math function to change the vertcies' position procedurally, you will want to use the displacement box. Patterns return floating point values which can be used to vary the amount of displacement.
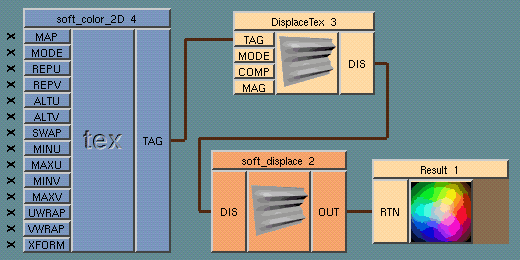
This is an example of a simple displacement shader:

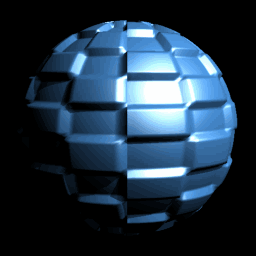
The rendered image looks like:

The soft_displace box can be used only with a map to define the displacement of the surface. The soft_color_2D box is used to give the location of the picture file to use as the map. The DisplaceTex box is used to define how that map is used for the displacement. The magnitude or height of the displacement can be controlled by the MAG button on this box. These four boxes need to be used in conjuction with one another. This is the SoftImage implimentation of a Mental Ray 'displacement shader':

